Thursday, 30 August 2012

Pumpkin, leek and lentil soup

This one was a very easy slow-cooker meal.  I browned some onions and garlic while a cup and a half of lentils were boiling, then chopped up half a pumpkin into small, even cubes (OK, so that took a while), a leek and several ribs of celery.

Everything went into the slow cooker with a goodly amount of white wine and chicken stock for eight hours on low - along with a little turmeric, a little paprika, a little coriander and a fair bit of oregano.

As it nears finishing you can fry some bacon and crumble it into the soup for a little extra - the salty meaty bacon goes well with the rich, slightly sweet pumpkin and fresh white bread. You could hit it with an immersion blender for a bit to even out the texture, but we ended up deciding that chunky would be better.

We ate this with the homemade bread I posted about a few days ago!

Wednesday, 29 August 2012

The Frankenmuesli

I like muesli.  A lot.  Several years ago I came to the conclusion that no muesli on the market quite fit my desires, so I started mixing my own. The project has taken on something of a life of its own since then, with a perpetually renewed vat of the stuff becoming a permanent pantry fixture.

This recipe has been through a thousand variations, and will no doubt go through a thousand more, but the vat needed to be refilled the other day, so I thought I'd document the current iteration. The stage is set:

And first, we add chopped apricots and pitted dates!

Then sultanas and a trail mix blend from Coles I'm fond of - almonds, cranberries, sunflower seeds and pumpkin seeds.

 Then the nuts.  We tend to use almonds, walnuts and macadamias, but cashews, hazelnuts, pecans, peanuts or whatever takes your fancy will do.  Toasted or raw is fine - I've even been mad enough to toast my own in the past, but Steph prefers raw. Do stick to unsalted, though.

Now some shredded coconut, a generous helping of bran and a bag of premixed toasted muesli - I like the texture and flavour difference of toasted muesli, but it's got quite a bit of added sugar and fat, so I wouldn't eat it straight.

Then fill the whole thing up with plain old rolled oats - the steel cut ones I use for porridge are a little too chewy when uncooked.

A very, very thorough mixing later, we have this:

With warmed milk, a scoop of unflavoured whey protein, fresh banana, apple and strawberry and, of course, an accompanying cappuccino, this is a madness worth having:

Monday, 27 August 2012

Lamb Rump Steaks

Although winter is coming to an end, we can still enjoy some of its best comfort food. For tonight we had one of my personal favourites - lamb. Lamb is one of the greatest meats you can eat, as long as you like your meat rare-to-medium-rare. Much like kangaroo, you can't overcook it as it loses all flavour and becomes terrible to eat the second it becomes grey inside.


Although meat is better on the bone, I personally love it when it doesnt have the encumberence. It's just frustrating to eat, and I, the king of lazy eating, sometimes need a great feed without too much difficulty.


You'll want to cook them for a very short time, herbing them up on both sides as you go. Great herbs for lamb include rosemary, oregano and mint. I've used mint jelly tonight as its awesome and shits all over whatever else you could use. Seriously, it's the best.


Fry the steaks for a short time each side until you get a nice crust, and then serve immediately. We had it with a nice salad left over from our BBQ on the weekend, but sadly didn't have any crusty bread. If you do this, get some crusty bread. A nice white wine will go wonders with it, too. Plate up, and enjoy!


Bread and circuses (Disclaimer: circuses not included)

Bread is basically magic.  Flour is by far the most boring of the white powdery substances and yet when a breadmaker weaves the dark rituals of the baker's art it turns into one of mankind's true marvels.    Intuitively we know that traditional bread recipes include just four things: flour, water, yeast and salt. Now, don't get me wrong, yeast is a pretty cool guy (eh kills himself to make booze and doesn't afraid of anything!), but don't we all suspect deep down that to get a real golden-crusted loaf with a pillowy delicious centre you have to sell your soul? Nothing that smells that good could come without eternal damnation.

OK, so that got a bit purple.  Maybe I should just write about what I did.  I found a guy who said you could make amazing bread in a home oven without hours spent kneading or a fancy stand mixer to do it for you.  That guy is here: http://www.youtube.com/watch?v=13Ah9ES2yTU.  Then on looking into it a bit more I discovered a post on the same topic by a scientifically-minded foodblogger I've read before (and recommend!): http://www.seriouseats.com/2011/06/the-food-lab-the-science-of-no-knead-dough.html.  This seemed like a thing which could be done! It would take several days, but the actual effort involved was very minimal.

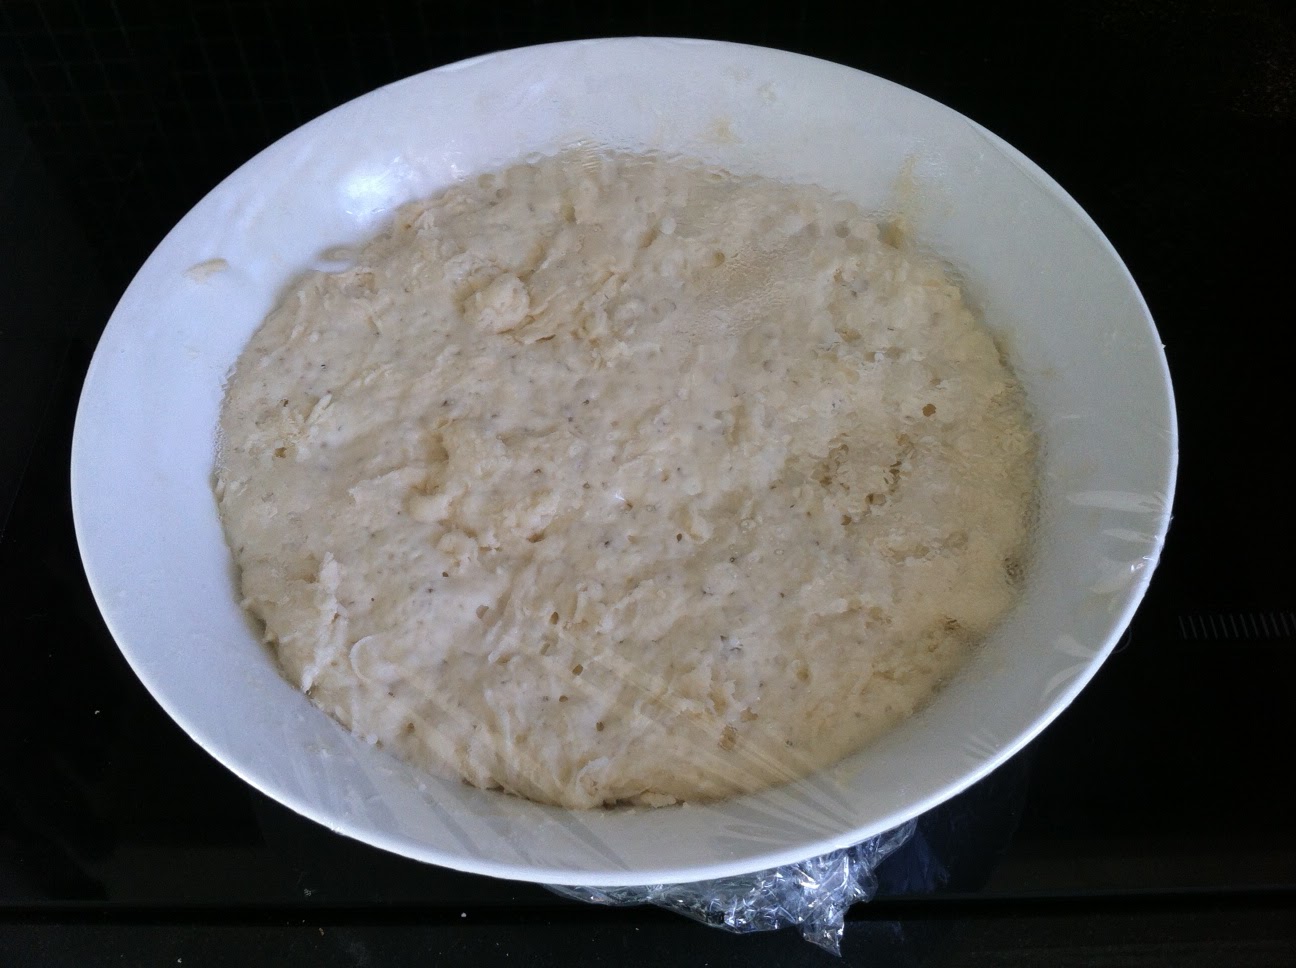
It starts with mixing 100 parts flour to 1.5 parts salt, 1 part instant yeast and 70 parts room-temp water. Ratios are apparently relatively important here. I made a small test roll which served two as a side with 150gr of flour.  Mix the dry ingredients thoroughly and then add the water, and do this in a bowl with plenty of room for it to rise. Once there's no dry flour cover it with cling wrap and walk away.  Leave it on the kitchen bench for 12-24 hours. Then put it in the fridge for 2-3 days.

Here's mine at this stage! Pour/scoop the sloppy wet muck onto a floured surface. Fold it a few times (OK, so there's not *no* kneading in this recipe) then shape it into whatever end shape you want (I stretched it out into a rough oval then folded the ends back onto themselves). Leave it to proof for 2-4 hours. You could also slash the top a bit after shaping if you wanted that cool artisanal look.

Now, at this point it's almost four days after we decided to make bread, and that's pretty crazy, but the actual effort required was to just measure and mix some stuff then leave it around for a while, then flop it out on the counter and spend two minutes pushing it around.

Pre-heat your oven to ALL THE DEGREES for at least 15 minutes with a large heavy-lidded pot inside - obviously you need an oven-proof pot of some kind for this, the recipes suggest a dutch oven, but I just used a metal-handled saucepan.  Once it's hot enough to melt small mammals, quickly AND CAREFULLY remove the pot lid, drop the doughblob into the bottom (don't worry, it won't stick), lid it up and get it back inside. Don't be an idiot like me and absent-mindedly grab the pot lid without your oven mitt even after repeatedly warning yourself to be careful.  Burns suck.

Bake for about 20 mins then remove the lid AGAIN CAREFULLY and bake for another 30 mins or so - it'll be golden brown coloured when it's done. Mine was pretty small so it took about 25. Let it cool for at least another 15 mins so the inside finishes setting. The result:

The reason for the sealed container within the oven is twofold - omnidirectional even heat and humidity.  Apparently real bakers' ovens are steam injected. This recipe uses a very high-water-content dough and a lidded vessel to get things hot and steamy - the telltale sign of this is tiny blisters on the crust, something like this:

Pure Maillardy magnificence. I think I've got a bit more experimentation to do here - this didn't rise as much as I expected and was a bit dense.  It rose on the counter, then fell in the fridge and never recovered during the proof.  It's possible our fridge is too cold (it's a shitty fridge that occasionally makes things ice over).  I also chickened out and only put the oven at about 200 rather than its theoretical max of 250 because the saucepan I was using said "oven proof up to 250", so maybe that was it.  The flavour and texture was amazing, though, like a cross between a chewy sourdough roll and turkish bread. I'm also not sure how much of the 2-3 days in the fridge was really necessary - the internet tells me it's to develop more flavour. More science is to be done!

Thursday, 23 August 2012

Steel-cut porridge

One thing that Steph and I love to do on weekends is make porridge.  It honestly doesn't actually take that much more time than regular breakfast, but it is something that deserves to be consumed leisurely and with respect, something that weekday mornings really do not provide.

The core of this porridge is steel-cut oats, also known as Irish or Kibbled oats.  Instead of being steamed and rolled, these are just whole oat grains (known as groats) that have been sliced up into chunks.  You can see some in the mix here:


The night before you want to eat, about 50gr of steel cut oats per person is added to a mix with some trail mix from Coles (dried cranberries, sunflower seeds, pepitas and almonds), some shredded coconut, a mashed up banana and some nutmeg+cinnamon.  This is then covered with a centimeter or so of milk and left in the fridge.  The overnight soak is because steel-cut oats can take quite a while to cook otherwise.


The next morning you'll find the grains and coconut have absorbed nearly all the liquid, so dump them into a saucepan with a little extra milk and crank it.  Once it starts bubbling, turn it down to med-low and simmer for 5 mins or so.  It actually finishes pretty quickly due to the overnight softening.


Add some unsalted nuts (we use macadamias, walnuts and almonds) and some more milk if you like, plus a scoop of whey protein powder if you're a crazy health loon like me, and serve.


For a complete breakfast, top with fresh fruit and accompany with a cappuccino!


Weekends are pretty awesome.

Omelette on toast

Another one of my brekkie things - omelette on toast. This is a variation of the omelettes I used to make when I had no milk. In place of milk use cottage cheese - it makes it amazingly soft and fluffy.

Ingredients to make the omelette:

  • 2 eggs
  • 2 tbls of (low fat) cottage cheese
  • mushrooms (1medium, sliced thinly)
  • salt and pepper (to taste)
  • bread (toasted). Multigrain bread is nice.
  • Baby spinach leaves or rocket (if desired)
How to make the omelette
  1. Crack eggs in a bowl. Add salt, pepper and the cottage cheese. Beat with a fork or whisk.
  2. Add oil in a small frypan and turn on to medium-heat.
  3. When oil is hot add the beaten eggs. Place mushrooms around the egg mixture. Cover for a few mins to help the eggs cook.
  4. Flip eggs (watch out, the cottage cheese makes the mixture soft and a little difficult to flip. Good luck :P), close pan with lid and reduce to medium heat. Cook for another 2-3 mins.
  5. Toast bread. Lather with with margarine. Top with baby spinach leaves (which gives it something extra rather than just eggs on toast) and then the omelette. You could do it the other way and have the omelette on the bottom, if you like. I find that putting them on the bottom stops them falling off, but on the other hand they get a bit sweaty. Up to you.
I also added some chopped shallots and topped the one in the picture below with some leftover parmesan and sweet chili dip that we had in the fridge and needed to finish off. It was a nice touch *shrugs*.


Quinoa and tuna fritters

The other week I was struck by a sudden case of health-nuttyness and purchased a bag of quinoa.  Quinoa (pronounced kin-wah, because etymology) is an Andean pseudocereal much touted for its health value - although on closer inspection it is nutritionally very similar to oats.  Given that oats have a very impressive macronutrient profile, and that quinoa typically replaces things like rice and pasta, that's not bad at all.  But you don't see that many health nuts touting the amazing superfoodiness of the humble oat.

So I wanted to try substituting the quinoa into some tuna fishcake things I've made before.  This proved a little difficult as I didn't have any breadcrumbs at all and quinoa doesn't provide nearly enough glueification by itself.  I boiled the quinoa, turned it off and let it absorb the remaining water, then mixed it, a can of tuna, some corn, some finely diced onion and capsicum, some parmesan cheese and several eggs, along with salt, pepper, garlic and a diced fresh chilli. The first one collapsed into mush in the pan as a result of the aforementioned glueificatory deficiency, so I added a bit of flour to achieve a more sane texture.

 Here's the finished pile of fritters, this actually took longer than I'd like - it would have been a bit faster with two people, but it was a bit fiddly because I could only do four or so at a time.  I'm not sure how healthy these were by the end - they soaked up a fair bit of oil each.

Extraordinarily delicious, though! Served with mixed greens, cherry tomatoes and a balsamic vinaigrette.