Thursday 30 August 2012

Pumpkin, leek and lentil soup

This one was a very easy slow-cooker meal.  I browned some onions and garlic while a cup and a half of lentils were boiling, then chopped up half a pumpkin into small, even cubes (OK, so that took a while), a leek and several ribs of celery.

Everything went into the slow cooker with a goodly amount of white wine and chicken stock for eight hours on low - along with a little turmeric, a little paprika, a little coriander and a fair bit of oregano.

As it nears finishing you can fry some bacon and crumble it into the soup for a little extra - the salty meaty bacon goes well with the rich, slightly sweet pumpkin and fresh white bread. You could hit it with an immersion blender for a bit to even out the texture, but we ended up deciding that chunky would be better.

We ate this with the homemade bread I posted about a few days ago!

Wednesday 29 August 2012

The Frankenmuesli

I like muesli.  A lot.  Several years ago I came to the conclusion that no muesli on the market quite fit my desires, so I started mixing my own. The project has taken on something of a life of its own since then, with a perpetually renewed vat of the stuff becoming a permanent pantry fixture.

This recipe has been through a thousand variations, and will no doubt go through a thousand more, but the vat needed to be refilled the other day, so I thought I'd document the current iteration. The stage is set:

And first, we add chopped apricots and pitted dates!

Then sultanas and a trail mix blend from Coles I'm fond of - almonds, cranberries, sunflower seeds and pumpkin seeds.

 Then the nuts.  We tend to use almonds, walnuts and macadamias, but cashews, hazelnuts, pecans, peanuts or whatever takes your fancy will do.  Toasted or raw is fine - I've even been mad enough to toast my own in the past, but Steph prefers raw. Do stick to unsalted, though.

Now some shredded coconut, a generous helping of bran and a bag of premixed toasted muesli - I like the texture and flavour difference of toasted muesli, but it's got quite a bit of added sugar and fat, so I wouldn't eat it straight.

Then fill the whole thing up with plain old rolled oats - the steel cut ones I use for porridge are a little too chewy when uncooked.

A very, very thorough mixing later, we have this:

With warmed milk, a scoop of unflavoured whey protein, fresh banana, apple and strawberry and, of course, an accompanying cappuccino, this is a madness worth having:

Monday 27 August 2012

Lamb Rump Steaks

Although winter is coming to an end, we can still enjoy some of its best comfort food. For tonight we had one of my personal favourites - lamb. Lamb is one of the greatest meats you can eat, as long as you like your meat rare-to-medium-rare. Much like kangaroo, you can't overcook it as it loses all flavour and becomes terrible to eat the second it becomes grey inside.


Although meat is better on the bone, I personally love it when it doesnt have the encumberence. It's just frustrating to eat, and I, the king of lazy eating, sometimes need a great feed without too much difficulty.


You'll want to cook them for a very short time, herbing them up on both sides as you go. Great herbs for lamb include rosemary, oregano and mint. I've used mint jelly tonight as its awesome and shits all over whatever else you could use. Seriously, it's the best.


Fry the steaks for a short time each side until you get a nice crust, and then serve immediately. We had it with a nice salad left over from our BBQ on the weekend, but sadly didn't have any crusty bread. If you do this, get some crusty bread. A nice white wine will go wonders with it, too. Plate up, and enjoy!


Bread and circuses (Disclaimer: circuses not included)

Bread is basically magic.  Flour is by far the most boring of the white powdery substances and yet when a breadmaker weaves the dark rituals of the baker's art it turns into one of mankind's true marvels.    Intuitively we know that traditional bread recipes include just four things: flour, water, yeast and salt. Now, don't get me wrong, yeast is a pretty cool guy (eh kills himself to make booze and doesn't afraid of anything!), but don't we all suspect deep down that to get a real golden-crusted loaf with a pillowy delicious centre you have to sell your soul? Nothing that smells that good could come without eternal damnation.

OK, so that got a bit purple.  Maybe I should just write about what I did.  I found a guy who said you could make amazing bread in a home oven without hours spent kneading or a fancy stand mixer to do it for you.  That guy is here: http://www.youtube.com/watch?v=13Ah9ES2yTU.  Then on looking into it a bit more I discovered a post on the same topic by a scientifically-minded foodblogger I've read before (and recommend!): http://www.seriouseats.com/2011/06/the-food-lab-the-science-of-no-knead-dough.html.  This seemed like a thing which could be done! It would take several days, but the actual effort involved was very minimal.

It starts with mixing 100 parts flour to 1.5 parts salt, 1 part instant yeast and 70 parts room-temp water. Ratios are apparently relatively important here. I made a small test roll which served two as a side with 150gr of flour.  Mix the dry ingredients thoroughly and then add the water, and do this in a bowl with plenty of room for it to rise. Once there's no dry flour cover it with cling wrap and walk away.  Leave it on the kitchen bench for 12-24 hours. Then put it in the fridge for 2-3 days.

Here's mine at this stage! Pour/scoop the sloppy wet muck onto a floured surface. Fold it a few times (OK, so there's not *no* kneading in this recipe) then shape it into whatever end shape you want (I stretched it out into a rough oval then folded the ends back onto themselves). Leave it to proof for 2-4 hours. You could also slash the top a bit after shaping if you wanted that cool artisanal look.

Now, at this point it's almost four days after we decided to make bread, and that's pretty crazy, but the actual effort required was to just measure and mix some stuff then leave it around for a while, then flop it out on the counter and spend two minutes pushing it around.

Pre-heat your oven to ALL THE DEGREES for at least 15 minutes with a large heavy-lidded pot inside - obviously you need an oven-proof pot of some kind for this, the recipes suggest a dutch oven, but I just used a metal-handled saucepan.  Once it's hot enough to melt small mammals, quickly AND CAREFULLY remove the pot lid, drop the doughblob into the bottom (don't worry, it won't stick), lid it up and get it back inside. Don't be an idiot like me and absent-mindedly grab the pot lid without your oven mitt even after repeatedly warning yourself to be careful.  Burns suck.

Bake for about 20 mins then remove the lid AGAIN CAREFULLY and bake for another 30 mins or so - it'll be golden brown coloured when it's done. Mine was pretty small so it took about 25. Let it cool for at least another 15 mins so the inside finishes setting. The result:

The reason for the sealed container within the oven is twofold - omnidirectional even heat and humidity.  Apparently real bakers' ovens are steam injected. This recipe uses a very high-water-content dough and a lidded vessel to get things hot and steamy - the telltale sign of this is tiny blisters on the crust, something like this:

Pure Maillardy magnificence. I think I've got a bit more experimentation to do here - this didn't rise as much as I expected and was a bit dense.  It rose on the counter, then fell in the fridge and never recovered during the proof.  It's possible our fridge is too cold (it's a shitty fridge that occasionally makes things ice over).  I also chickened out and only put the oven at about 200 rather than its theoretical max of 250 because the saucepan I was using said "oven proof up to 250", so maybe that was it.  The flavour and texture was amazing, though, like a cross between a chewy sourdough roll and turkish bread. I'm also not sure how much of the 2-3 days in the fridge was really necessary - the internet tells me it's to develop more flavour. More science is to be done!

Thursday 23 August 2012

Steel-cut porridge

One thing that Steph and I love to do on weekends is make porridge.  It honestly doesn't actually take that much more time than regular breakfast, but it is something that deserves to be consumed leisurely and with respect, something that weekday mornings really do not provide.

The core of this porridge is steel-cut oats, also known as Irish or Kibbled oats.  Instead of being steamed and rolled, these are just whole oat grains (known as groats) that have been sliced up into chunks.  You can see some in the mix here:


The night before you want to eat, about 50gr of steel cut oats per person is added to a mix with some trail mix from Coles (dried cranberries, sunflower seeds, pepitas and almonds), some shredded coconut, a mashed up banana and some nutmeg+cinnamon.  This is then covered with a centimeter or so of milk and left in the fridge.  The overnight soak is because steel-cut oats can take quite a while to cook otherwise.


The next morning you'll find the grains and coconut have absorbed nearly all the liquid, so dump them into a saucepan with a little extra milk and crank it.  Once it starts bubbling, turn it down to med-low and simmer for 5 mins or so.  It actually finishes pretty quickly due to the overnight softening.


Add some unsalted nuts (we use macadamias, walnuts and almonds) and some more milk if you like, plus a scoop of whey protein powder if you're a crazy health loon like me, and serve.


For a complete breakfast, top with fresh fruit and accompany with a cappuccino!


Weekends are pretty awesome.

Omelette on toast

Another one of my brekkie things - omelette on toast. This is a variation of the omelettes I used to make when I had no milk. In place of milk use cottage cheese - it makes it amazingly soft and fluffy.

Ingredients to make the omelette:

  • 2 eggs
  • 2 tbls of (low fat) cottage cheese
  • mushrooms (1medium, sliced thinly)
  • salt and pepper (to taste)
  • bread (toasted). Multigrain bread is nice.
  • Baby spinach leaves or rocket (if desired)
How to make the omelette
  1. Crack eggs in a bowl. Add salt, pepper and the cottage cheese. Beat with a fork or whisk.
  2. Add oil in a small frypan and turn on to medium-heat.
  3. When oil is hot add the beaten eggs. Place mushrooms around the egg mixture. Cover for a few mins to help the eggs cook.
  4. Flip eggs (watch out, the cottage cheese makes the mixture soft and a little difficult to flip. Good luck :P), close pan with lid and reduce to medium heat. Cook for another 2-3 mins.
  5. Toast bread. Lather with with margarine. Top with baby spinach leaves (which gives it something extra rather than just eggs on toast) and then the omelette. You could do it the other way and have the omelette on the bottom, if you like. I find that putting them on the bottom stops them falling off, but on the other hand they get a bit sweaty. Up to you.
I also added some chopped shallots and topped the one in the picture below with some leftover parmesan and sweet chili dip that we had in the fridge and needed to finish off. It was a nice touch *shrugs*.


Quinoa and tuna fritters

The other week I was struck by a sudden case of health-nuttyness and purchased a bag of quinoa.  Quinoa (pronounced kin-wah, because etymology) is an Andean pseudocereal much touted for its health value - although on closer inspection it is nutritionally very similar to oats.  Given that oats have a very impressive macronutrient profile, and that quinoa typically replaces things like rice and pasta, that's not bad at all.  But you don't see that many health nuts touting the amazing superfoodiness of the humble oat.

So I wanted to try substituting the quinoa into some tuna fishcake things I've made before.  This proved a little difficult as I didn't have any breadcrumbs at all and quinoa doesn't provide nearly enough glueification by itself.  I boiled the quinoa, turned it off and let it absorb the remaining water, then mixed it, a can of tuna, some corn, some finely diced onion and capsicum, some parmesan cheese and several eggs, along with salt, pepper, garlic and a diced fresh chilli. The first one collapsed into mush in the pan as a result of the aforementioned glueificatory deficiency, so I added a bit of flour to achieve a more sane texture.

 Here's the finished pile of fritters, this actually took longer than I'd like - it would have been a bit faster with two people, but it was a bit fiddly because I could only do four or so at a time.  I'm not sure how healthy these were by the end - they soaked up a fair bit of oil each.

Extraordinarily delicious, though! Served with mixed greens, cherry tomatoes and a balsamic vinaigrette.

Fruit on toast (literally)

A healthy-ish take on sweet stuff you slap on toast - this is something I decided to try for brekkie one morning:

  • banana and honey on toast (a well-known combination)
  • strawberries on toast (not so well-known)
I used the Capeseed loaf you can get from Bakers Delight. If you don't have this, I suggest any good multigrain bread, because it's the seeds and grains that make this toast interesting and gives it a nice texture.


Banana and honey on toast - this was really good  :)
  1. Toast your bread - duh!
  2. Top with:
    • chopped banana
    • sprinkle with ground cinnamon (fresh if you're really a nut) nutmeg
    • drizzle with honey
Strawberry and cream cheese on toast - this was an attempted retake of the much-loved strawberries and cream, but with a twist
  1. Toast your bread - duh!
  2. Top with:
    • generous smearing of cream cheese (low fat if you're worried about that stuff)
    • chopped strawberries
    • drizzle with honey for a sweet touch

Garlic, Tomato and Prawn Fettuccine

So this is a really simple pasta dish that is very tasty for the amount of effort. Well worth cooking on a weeknight if you want something warm and easy to do.

Ingredients:

  • Fettuccine
  • Crushed tomatos (400ml can)
  • Baby roma tomatoes (cut in half)
  • Handful of fresh baby spinach
  • Garlic (3 cloves, minced or chopped finely)
  • Onion (1 whole, chopped finely)
  • Prawns (about 200g)
  • Olive oil (enough for frying onions)
  • Passata (250ml = 1 cup)
  • Oregano (1 Tbs, for taste)
  • Basil  (1 tspn, for taste)
  • Salt and Pepper (for taste) 
  • Shaved parmesan (for garnish and taste)

How to cook it:

  1. If your using frozen prawns, take them out and put them in water to thaw as your preparing the other ingredients.
  2. Chop the onion and mince the garlic.
  3. Add oil to frypan and heat. When oil is hot add onion. When onion is slightly coloured add minced garlic. Cook for a few mins on high for a minute or so till their coloured and lightly brown - but don't let them burn :P
  4. Drain prawns and add to frypan. Cook on hight for a minute or so.
  5. Add crushed tomatoes, passata, oregano, basil, salt, pepper and turn down heat to a simmer.
  6. Pour in the tomatoes.
  7. Whilst simmering, cook fettuccine.
  8. Just before serving add fresh baby spinach leaves to the pan and stir through gently.
  9. Serve pasta in a bowl. Spoon your awesome pasta sauce over it and top with desired amount of parmesan.


Now, for the evidence!


Things to note:
  • I suggest using baby tomatoes of some kind as they are sweet and give a nice balance to the dish rather than the regular tomatoes. You could instead use cherry or grape tomatoes.
  • Frozen prawns work absolutely fine. I used frozen peeled prawns that I bought from Coles, which we found in the frozen foods section.
It was yummy!  :)

Chicken Tajine


So, I actually made this several weeks ago, told Lem that I had done so and intended to post about it on this fair blogthing.  This precipitated her cooking something similar and then posting about it before I got my act together. Oops.

So, I made a slow-cooked chicken tajine/tagine/tahine - a North African dish with dried fruit, spices, onions, chickpeas and whatnot, traditionally served with rice or couscous.  Chicken and bean stew with honey and spices is pretty awesome, even if it might not seem so at first.

I started by chopping onions, garlic and some fresh chillis, browning them a bit and tossing them in the slow cooker. I then browned a pile of chicken pieces - about six drumsticks and two marylands - and tossed them in afterwards.  I've noticed Lem tends to load up a slow cooker with things based on cooking times, but I just throw stuff in as I prepare it and then give it all a good stir - and most of the time that means stuff that gets browned goes in first.

On top of the maillardified bits I threw a solid handful or two of sultanas, chopped dried apricots and chopped pitted dates (the pitted ones don't taste quite as good but they last forever and are still pretty tasty!)  Also, they are pretty roachy, now that I think about it.

On that I threw two tins of chickpeas and a tin of butter beans.  Butter beans are hardly traditional, but they are delicious, and it needed more beans. I followed that with a good slop of passata and some chicken stock.

Then time for flavours - cinnamon, allspice, honey, cumin, turmeric, paprika and ginger are a must, while a little cayenne, oregano and coriander I just threw in for giggles. A half cup or so of white wine would totally not have been added by the traditional makers of this dish - them being Islamic and all - but I have no such reservations and a little wine in slow cooked stuff is always great. About an hour before the end I threw a bunch of grape/cherry/baby plum/whatever tomatoes in too.


Slow cooked for eight hours then served with brown rice or couscous, for deliciousness!

A Steph-sized serve:


And a Kaz-sized one:


Tuesday 21 August 2012

Beef Tagine

Kaz's tagine post inspired me to dig out the tagine recipe in one of my cookbooks. I've only made this once before, mostly because it has several ingredients I don't tend to buy or use much. It also takes longer than I would like on most weeknights, although this time I did it in the slow cooker, allowing me to prepare it the night before and just leave it going.

First you chop up the following things and put them in the slow cooker (in layers as usual): carrot, onion, dried fruit - the recipe says dates, prunes and apricots, and that's what I used. Sidenote: dates look disturbingly like cockroach fruit. I cannot unsee this once it had occurred to me, and since I had to chop them up while thinking about it, now you do too.

For spices, it has cumin (lots), paprika, ginger, garlic, a cinnamon stick and a couple of bay leaves. Then you prep the meat. It says to cut up the beef, then dust it with flour and sear it. I am not entirely sure what the flour is for, but the recipe said so I did. Presumably it helps keep the meat juices inside. I'm not sure this is really a necessary step when using a slow cooker; perhaps next time I shall experiment because putting the flour on all the bits of meat was more fiddly than I would have liked. Lastly you pour in some beef stock - the recipe said 500mL but I used less because food tends to generate and retain a lot of liquid in the slow cooker.

My recipe says to serve it with couscous, so I'll go through preparing that, but I think it would also work quite well with turkish bread, wraps, or just rice. Or maybe roti or something like that. Anyway, I made couscous. You put the couscous in a bowl with cumin, pepper, salt, butter, olive oil and a spanish onion (chopped up of course). I soaked the onion first although I think next time I will do so for longer because I found the flavour to be still a bit too strong. I am not a huge fan of spansih onions but soaking them makes them much milder and, in my opinion, better. Lastly you pour over some boiling chicken stock, then put some gladwrap over the top of the bowl and leave it for 5-10 minutes to absorb the stock. Then fluff it up with a fork and serve.

This is what the couscous looked like before serving it.


And this is the final result, with some fresh coriander on top to garnish.


Conclusions:
 - Dates are tasty, even if they look creepy when cutting them up, and I should use them more.
 - Couscous is also tasty, especially with some butter and spices, and very easy and quick to prepare. I should also use this more.
 - Putting flour on bits of meat will leave your hands covered in gross floury/meaty goo.
 - Tagines are tasty and quite different to most of what I make. I should experiment more with them, although perhaps with less cumin. I'm not as much of a fan of it as the recipe-maker seems to be.

Edit: Realised Kaz hasn't actually posted about his tagine yet, just told me about it. Hurry up and post, Kaz, so my post makes more sense.

Monday 20 August 2012

Thai-style Surf and Turf


This meal was intended to be Thai Beef Salad, but I got lazy halfway through and decided to just make it into Surf and Turf. For anyone who doesn't know what that means, it's steak and prawns. As a side I made a simple salad with some of the ingredients that were to be in the original salad. The steaks were cooked Medium-Rare with 1 minute flips on each side, and were quite juicy. I'd bought decent quality meat so it ended up as quite the tasty meal. The meat and prawns were marinated in a Thai style sauce I made using lime juice, sweet chilli sauce, fish sauce, peanut oil, brown sugar and coriander, and was quite piquant in taste. We used our new Tefal pan and it was incredible how easy cleaning it was afterwards - no more cheap frypan for me :D


Wednesday 15 August 2012

Thorburn Familia Pizza

So it seems the gauntlet has been thrown down in the high stakes world of homemade pizzas. Sure, Kaz has a good recipe, the ability to actually make circular pizzas and attractive photos, but I've... got jalapenos and olives? And we're more traditional as we have Familia in the name and I'm from Italy. Western Sydney's a part of Italy, right?

In all honesty, we're only new at making pizzas, having for years subsided on the poor fare from chain restaurants and the like. We splashed out on a neat pizza oven with a baking stone, but still were lazy and just bought premade bases from the supermarket like the mugs we were. One day, however, we had a couple too many drinks and thought: 

"Hell, I used to work at Dominos and make dough, and it was piss easy. Surely I can do that now!"

Of course, this assumed we had any ingredients. Since we didn't, we staggered down to the shops to buy yeast, flour and water, although we then realised we own taps that provide free water (and possibly yeast) so we didn't need to buy that. We also bought as many ingredients as we thought we could put on in interesting ways.

To make the dough we started by mixing yeast and caster sugar (just a little) with warm water and putting it aside for a short time to let the mystical bubbling process occur. Please take note of the technical terms in my recipe, and if you need clarification please google for a better recipe. One with amounts and times, for example. Whilst this is bubbling away put flour into a big mixing bowl, making a hollow in the centre. Once it's been 5 minutes or so and the bubbling mixture is going for its life, pour it into the hollow. Use a butter knife or similar to mix it into the flour, continuing until you've got a nice lump of dough. 

Once it's all mixed together, take it out and put it on a prefloured surface (we use our granite counter) and beat/knead it for a while until it's thoroughly beaten or you get bored/tired. Put it in a lightly greased bowl and cover it. Leave it for a few hours so it can rise. The amount of time depends on how much self control you have as it'll start smelling good, and since you're probably drunk at this point you'll have no ability to stop yourself eating it immediately. Try to hold out as long as possible.

Once you give up, take it out and pull it into a few pieces. With our normal measurements we get 3 pizzas, but you can scale up and down easily (especially since I haven't mentioned any measurements). For each blob of dough, roll and pound it into a ball and then roll it into a pizza shape. We're not fancypants like Kaz who make pretty circles - we instead make whatever shape we find the dough naturally goes in. It's because we're authentic and artistic, and not a hint that we're hacks who can't do things properly. I like to think the random edges give it character. 

Once it's in the rough pizza shape, you can add ingredients. We always put the pizza sauce on first, followed by a layer of cheese. A nice mix of mozzarella and tasty gives a good mix of tastes that works well with most toppings. Next up is whatever toppings you like, followed by spices and a light sprinkling of cheese on top. We then put it in the prewarmed pizza oven (remember to prewarm the pizza oven) for 10 minutes on medium and then 5 minutes on high. The stone gives it an awesome crunchy and flavoursome base, enriched with the oils from pizzas past. I'd heavily recommend getting a pizza stone as they instantly make any pizza 100% better. Take it out, cut it up, devour. Simple as that. 

Here are a few recent creations:


One of mine, with chorizo, chilli, black olives and jalapenos. Nice and spicy. I mixed some herbs into the dough which gave it an interesting garlicky aftertaste.


Sam's pizza: a ham and pineapple. Erk. Stupid fruit.


Another of mine, with pepperoni and jalapenos and four different cheeses. I do so love cheese.

So there, Kaz - your move! :P

Grace Family Pizza

This one is a recipe I learnt from my father. When I was younger Mum always used to cook every day but Saturday, and that was when she'd get a break and Dad would take over. After several false starts I learned this recipe at the foot of the master, and then after making it properly once I immediately started messing with it. 

This does take a little while, but it's honestly not as much of a hassle as you might think - although things do get a little messy in the kitchen.

Step one is bloom the yeast.  All quantities here are for two pizzas.  Add a tablespoon of dried yeast to a big bowl, then add a tablespoon of sugar and a cup of warm - but not hot - water.  Cover the bowl with a teatowel so it's relatively dark in there and leave on the counter for 15 mins.

Then add about a teaspoon of salt and about two cups of flour.  Keep the flour out, you'll need it again. At this point you can mess with the recipe a little - some olive oil will give you better browning, some oregano will give you a herby crust, I've even substituted some flour for oat bran in the hopes of making a healthier crust.  Mix everything in with a spoon, then as it starts to come together switch over to your hands.  When things are inevitably too sticky, dust in some flour.  Work it into one lump then start pressing your fingertips/knuckles into it to make divots and then folding it over. You're trying to work some air into it as well as agitate the flour enough to form gluten, so you need to use a fair bit of pressure but try not to flatten it too much. You should probably do this on a floured work surface, but I'm lazy and just do it in the bowl.  Knead for 5-10 mins or so then shape into a ball, drizzle a tiny bit of olive oil on the ball to stop it drying out, then recover and leave to rise.  After about 30 mins it should have roughly doubled in size.

This is where some more room for experimentation comes in.  I've done a lot of research on pizza dough recipes and textures, and one technique that crops up a fair bit is to let it rise for a few hours (sometimes even overnight), then put it in the fridge for three days, then bring it out and let it come to room temperature, then proceed.  


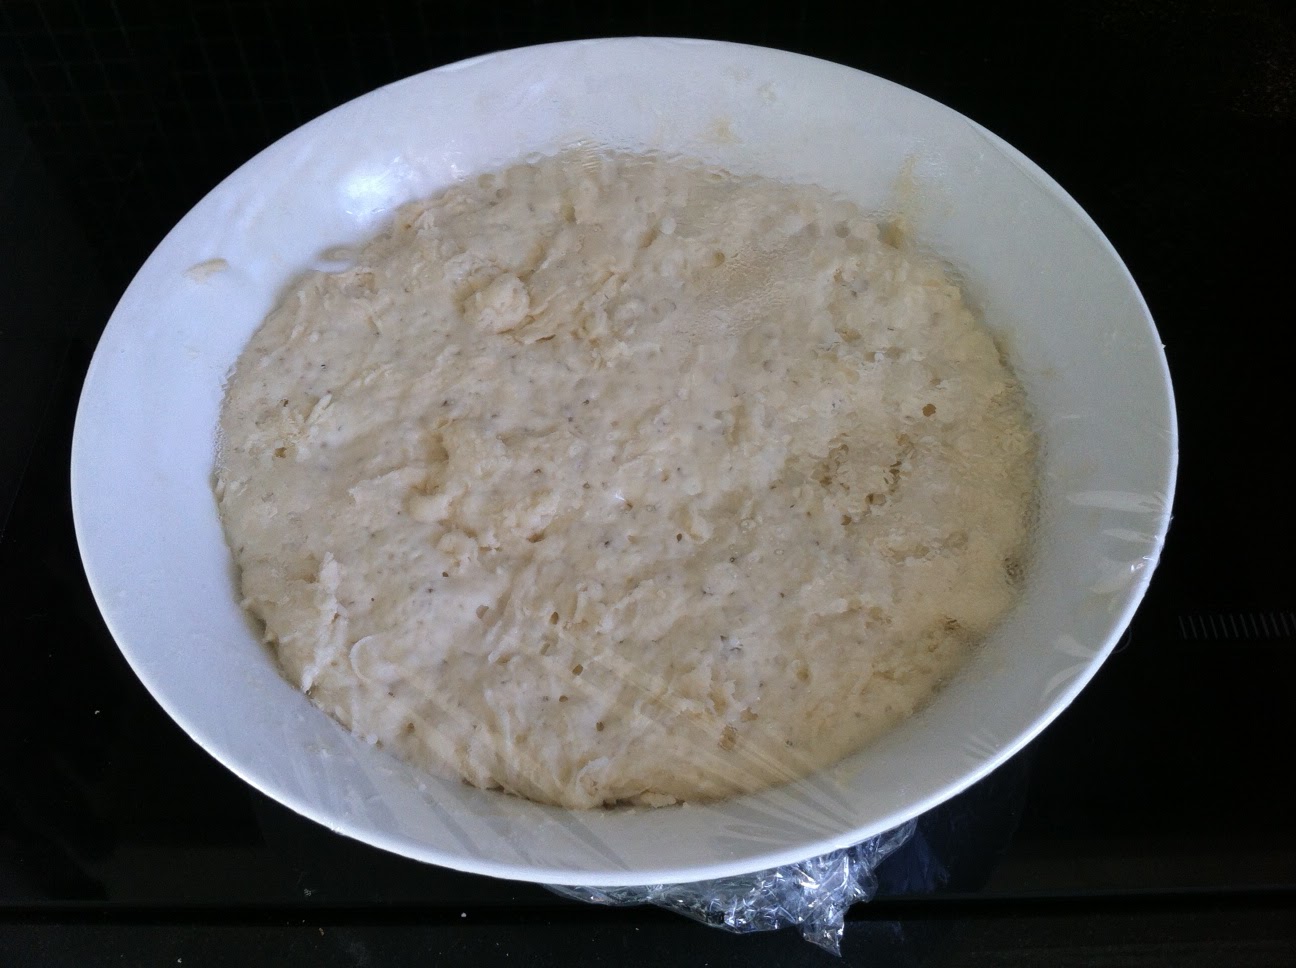
I tried this once with about 8 hours in the fridge - the technique is to roughly cover it with cling wrap so it doesn't dry out in the fridge and then leave it. Thus far I have not had the foresight to start making pizza three days in advance of when I want to start eating it, but I am told the long, slow rise in the fridge improves both crust flavour and texture.  I must try that some time.  Anyway, back to the actual pizza I did make.

Grab your big doughball and twist it in two.  Reshape those into nice orbs and then press the centres to get a semi-toroid with a thin membrane in the middle instead of a hole.  With your hands make the toroid bigger for a bit, until it gets a little difficult to handle, then plop it down on a pizza stone or tray (any tray will do, really) and press it the rest of the way out to the edge with your hands, trying to keep a "lip" at the edge that is a bit thicker than the rest so you get a nice bulge at the crust.  No photos of this as my hands were covered in flour by this point, but the trick is to push out rather than down.  Your dough might be a little elastic, if so just stretch it and let it relax a few times - the gluten will loosen up eventually.  If you find yourself sticking to it at any point, just dust your hands with a little flour.

When making pizza you are supposed to build on a slide (called a "peel") while you pre-heat the stone/tray in the oven in order to get it nice and crazyhot.  I have never bothered doing this, which means I have to cook my pizzas at a lower temperature for longer, which produces less impressive crusts.  I fear that trying to slide a pizza off a peel onto a blazing hot rock would only result in catastrophe, so I've not tried going down that route just yet!

For the sauce, I again cheat a little.  Dollop of passata in the middle of the pizza.  Add copious amounts of garlic, oregano and basil to this dollop.  Swirl around with the back of the spoon until mixed, then spiral outwards until you reach the edge of the pizza.  Sure, you could mix this in a bowl somewhere else, but lazin^H^H^H^H^Hefficiency is a virtue.


 Toppings!  Here you are pretty much free to go nuts. This time we made one with onion, mushroom, capsicum, cherry tomatoes, pineapple, ham and corn (no, seriously, trust me on the corn), and the other with onions, shallots, chives, capsicum, extra garlic, chilli, prawns, cherry tomatoes and feta.

 Assembled and ready for en-cheesinating.  Note the thin covering of flour over absolutely everything.
Cheese! You could use mozzarella for this, but I actually like the extra flavour from a nice tasty cheddar. That would probably get me knifed in Napoli, but I stand by my choice.
Into a hot (200C, or 170-ish fan-forced) for 30 mins or so or until cheese browns.  The less toppings you have the higher heat you can use and still have the cheese brown before the crust gets hard. The more toppings you have the lower heat you have to use and the less impressive the crust will be - faster cooking = better crust. But I love toppings too much to go with the sparse Neapolitan style of just tomato sauce, mozzarella, basil and anchovies.  If you have a good grill in your oven you can put this on as well to help brown the top - although if you're doing multiple pizzas don't forget to switch them around halfway through!  I find swapping places to be a good idea in general - ovens are never quite even. This is where a pre-heated stone would be a winner - you could use lots of toppings and a high heat and the base wouldn't still be uncooked and doughy when the top and edges were done. More sciencing is required!
Some more post-oven shots. This post is already ridiculously long, so why not make it longer?

And the obligatory plate-shot.  Steph put one piece of each pizza on her plate and arranged them nicely for the camera.  However, that's not quite going to cut it for me...
Ahh, that's more like it. Poorly arranged, perhaps, but that's what a plate of pizza should look like!